Tour Stop: Iberostar Grand in Riviera Maya, Mexico

Mexican Hotel Review

The first stop on my tour was to Riviera Maya, Mexico. A treat to say the least. The hotel was something out a dream. I have stayed at many 4 and 5 star All Inclusive Resorts in Mexico but this resort blew my mind. The food, service, entertainment and all the outstanding amenities, every single detail of our trip was perfect. The resort complex is made up of 5 resorts all on different levels. The higher the level, the more access to the complex. We were upgraded to the highest level which is named the Iberostar Grand. It gave us access to all the restaurants, pools, spas, shows and activities.
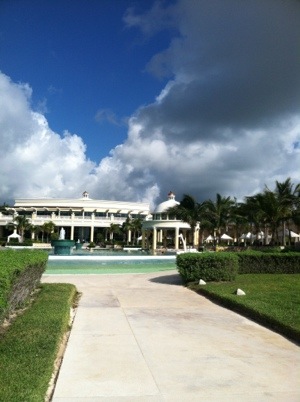
The building and the grounds where outstanding. A quiet pool to relax and read, an indoor spa pool with hot tubs and pressured streams of water that line the walls and then the infinity pool. The infinity pool is salt water and was magnificent, with views of the ocean, swim up bar, hot tubs and plenty of areas to lounge. You could dream up any drink and the pool bartender would create it like magic. Just float around and sip on a frozen mojito, a dirty monkey or just about anything with every liquor you could ever want.
The building itself is very different then any other resort I have seen. It was elegant with a grand entrance that resembles a jungle with details that constantly made my head spin. From the lobby to the room and then restaurant it is all enclosed in with glass and marble with painted domed ceilings. This creates a unique level of comfort and elegance. Staff always available to assist from concierge to our own personal butler. The room was spectacular and included a jacuzzi, rainfall shower, king bed with a selection of pillows, lounge area, fully stocked mini bar included in the room and balcony with a private couch and with a hanging swing chair.
The activities offered gave us no reason to think of leaving the resort. The entertainment staff take pride in what they do and truly enjoy meeting new people. They organized great exercise classes like cycling, bike tours, volleyball and yoga that were really hard core. Fun pool and beach games like a crazy water balloon fight with guest throwing balloons at staff in the pool while they wore super hero outfits and floated on a trampoline. In the evening the staff would transform into excellent party hosts. They would greet us into the shows. The shows were much better then any of the other shows I have seen in Mexico. The theater was indoor’s and the set up was like a night club you find in the city with stadium seating, top notch bar and service. The shows are different every night including a magic show, Mexican dances, Broadway musicals and best of all a real Rock show. If shows are not your thing they have a sports lounge, cigar lounge, live music at the main bar or you can ask a bell boy to give you a ride to the two level all inclusive night club that is on the resort grounds and very safe.
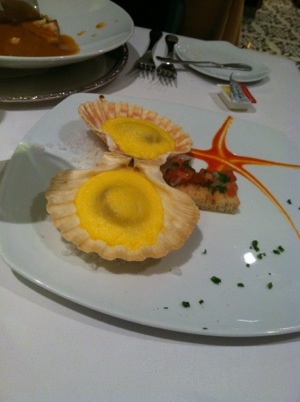
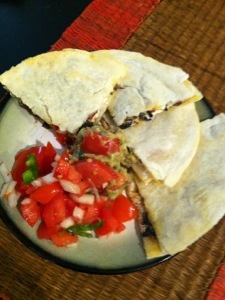
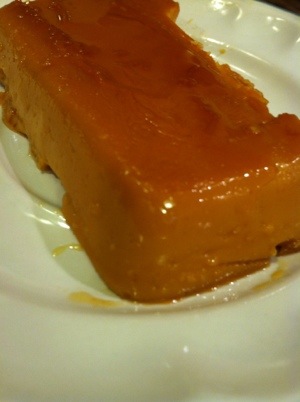
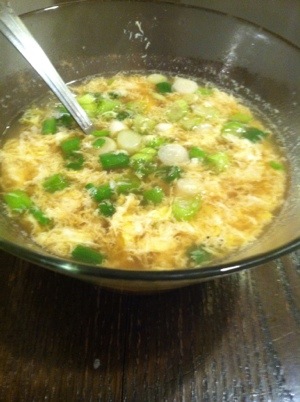
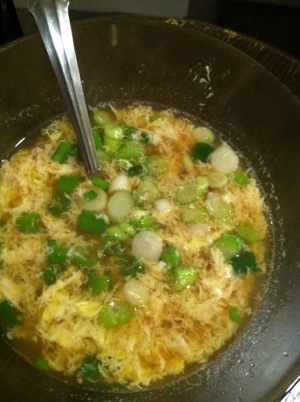
The best part of the resort was the food! Being gluten free is often difficult to travel. Very few places understand that gluten is not just the bread but can also be in sauces and the preparation. I informed the general manager before I came, that I was gluten free but never expected anyone to make adjustments. It started with a notice that was on my bed at check in. The note was for me to take to the restaurant’s at night to notify them once I arrived, to advise the kitchen staff. Restaurant’s included Italian, Surf and Turf, Japanese and French. Each meal is a la-carte, gourmet and perfect on all levels. The wait staff is knowledgeable about both the food and wine and the little details they add make the dining experience something to remember. Each night I was given my own fresh baked gluten free bread and advised on any changes they would make to the menu if I selected specific options. At every single meal, I had lobster prepared in a different way. We visited the Surf and Turf twice because everything about the meal was fabulous. The gluten free crab soup and cold seafood appetizer that was a huge plate of lobster, mussels and crab. The main dishes included old fashion Surf and Turf with Lobster Tail and Filet Mignon, many seafood dishes or cuts of steaks I have only seen at expensive places in the city. Dessert included this gluten free chocolate bacon dish and a gluten free cheese cake. At the Japanese restaurant I was surprised by the staff knowledge of sauces and ingredients containing gluten. The sushi was fantastic and each item we tried was spot on. The Saki they offered was outrageous and I still wish I would have gotten the brand name to buy at home. Lunch, is served both a la-carte and buffet or both. The selections change every day but always included some seafood dishes being grilled outside, another indoor grill that you could choose any fish you could imagine, all different Mexican selections, different Ceviches and cold Seafood options, Salad bar, Ice cream and Dessert that were all top notch. Breakfast was similar with both a la-carte and buffet options. The breakfast included a Fruit bar with all types of Tropical fruit even Star fruit, Figs and Passion fruit. Bread station that had both gluten free and regular options and a huge assortment of accompaniments with home made jams, butters and large selection of cheese. The egg station was manned by a chef, homemade donut stations, crepe station and curered meat station where you can watch them gently carve slices of prosciutto. My favorite breakfast item is lox, which they not only had an endless supply but all marinated salmon and like ten other smoked fish options along with various Caviar and Pate to choose from. At the end of it, was a juice bar with freshly squeezed juices like papaya, Watermelon, Grapefruit, Spinach and Cactus, mixed veggie and more. If the juice selection was not grand enough you could head to the health bar and pick anything you wanted them to juice like my favorite combination of Carrot Apple Juice.
The resort knew I would be doing a review, and provided me with a full tour of the kitchen and a meeting with the executive chef. The kitchen is immaculate from floor to ceiling. Each room is temperature controlled depending on what is being made. Desserts and Seafood are prepared in cold rooms. The veggies are cleaned and sanitized daily and all examined by an doctor to insure they are safe. The Chef informed me that they continue to have about a 10% population of guests with gluten and wheat allergies. He explained to me that by September all sauces used in the resort will be reformulated to be gluten free. Being able to see how this massive kitchen was run during dinner service was an amazing sight to see. I have never seen any kitchen run that smoothly and efficiently. I was truly impressed.

Iberostar Grand is a resort that has something for everyone. They will clearly go above and beyond to make your trip perfect and truly something to remember. If you are living gluten free and have been scared that an all inclusive resort wouldn’t be enjoyable, think again. Simply stated, a perfect vacation.

Thanks again to all the staff and Chef’s at the Iberostar Grand for making my vacation something very special. Please visit the links below and to check out the resort and plan your trip.

I booked my trip here:

http://www.cheapcaribbean.com/deals/iberostar-grand-hotel-paraiso-deals.html

Or go to the resort directly:

http://www.iberostar.com/en

20120830-155747.jpg

20120830-155802.jpg

20120830-155840.jpg

20120830-155855.jpg

20120830-155936.jpg

20120830-155954.jpg

20120830-160011.jpg

Quesadilla

Since most quesadilla’s are made on big flour tortilla its one of the few mexican dishes that are hard to get gluten free. I have been playing with my favorite pizza crust from Sweet Christine’s Bakery and figured out that the work great for making quesadilla’s in the oven. Bonus, two of these gluten free crusts Are less calories the one big flour tortilla.

Recipe –

2 gluten free 10 inch pizza crusts ( Buy the best at http://www.sweetchristinesglutenfree.com )

¼ Cup red pepper sliced

¼ Cup Sliced Mushroom

1/8 Cup Mexican Cheese Shredded

½ teaspoon chipotle powder (Use paprika is you would prefer it not spicy)

½ teaspoon Adobo seasoning

Salt and Pepper to taste

Oil or non stick spray

The first step is to slice and sauté the veggies on an well oiled pan. While veggies cook add in salt, pepper, chipotle powder and adobo seasoning. Cook on a medium flame for about 5 minutes or until veggies begin to get soft. Spray/ Oil both sides of each crust. Place on a sheet pan and top first with an even layer of veggies and then cheese. Place second crust on top and press down. Bake at 450 for 5 minutes and then carefully flip and continue to cook for an additional 3-4 minutes. Remove from oven and allow the quesadilla a few minutes to cool. Cut in to triangles and serve with salsa, sour cream or guacamole.

20120823-120654.jpg

Lizbeth Lane Simmer Sauce

I love when I am asked to review a new gluten free product. It’s great when I can try something new, play with it, and then tell you where to get it.

I recently received a set of Lizbeth Lane Simmer Sauce. They are all gluten free finishing sauces which are a simple way to turn any basic dish into something gourmet in under five minutes. Many sauces like this, normally have a thickening agent that contain gluten. This product is 100% gluten free. The different flavors go well with seafood, veal, chicken and pork. You basically just sauté the meat in a pan with olive oil and then add the jar of sauce to the pan for the last five minutes. Once the meat is cooked just serve over gf pasta or rice.

This sauce will make any weeknight meal into something special. Give it a try and let me know what you think. You can buy any of their products at http://www.LizethLaneCuisine.com. You can also find them at Acme and Whole Foods in the Delaware Valley. The website has some good recipes but one of mine is below.

Ingredients:

1 Jar of Roasted Red Pepper & Basil Cream Lizbeth Lane Sauce
1 Yellow Pepper
2 Chicken breast Sliced
2 Cups Riced Cauliflower

Slice pepper and cook over medium meat with chicken breast for about 4 minutes. Pour in jar of sauce and continue to cook until sauce is hot and chicken is completely cooked.

I like to use veggies instead of pasta. Sometimes I use shredded carrots, broccoli slaw, spaghetti squash or this time a cauliflower dish that is similar to rice. Simply remove the florets of the cauliflower from the stalk and either grate by hand with box grater or in a food processor.

Serve over Cauliflower or pasta with parm cheese on the side.

I plan to get a little fancy with some of the other sauce so check back soon for more great ways to use this fun gluten free product.

20120827-111222.jpg

20120827-111249.jpg

Flan

The other night my boyfriend and I where sitting on the coach and he said he was home sick and all he wanted was his mommy’s flan. I was not allowed to look up a recipe or put my own spin on it, I had to get the exact recipe directly from her and no funny business. So, at 10 P.M. my mission started.

EDITED: 12/25/16

Ingredients:

2 Can of condensed milk
1 Can full of water
6 egg yolks
4 whole eggs
1 cup sugar
* vanilla or any extract optional

In a large bowl beat eggs very well and then slowly add milk and water and continue to beat and whisk very well. If you have a mixer or blender that might be more very helpful. Blend together the eggs, then separately blend together the milk and water. Slowly add the milk/water mixture to the egg mixture while mixing together.  In a small pan pour in sugar and melt into a syrup. This will take time, but be patient and continue to stir. Keep the pan at a medium heat and keep stirring and you see a caramel form in about five minutes. ( Note: If you over cook the sugar it will start to clump and form crystals. If the heat is to low the syrup will never form and sugar will turn dark and hard. ) Now take the hot syrup and pour it quickly in to a well sprayed baking dish that is the shape that you want the flan to form. Quickly move the sugar around to cover the bottom. This is hard because it will harden quickly, but its fine if its not perfect because it will melt in the oven. Now pour the egg mixture on top of the syrup in the baking dish.

Set up a water-bath. The picture below will show you how I did it. I filled a large baking pan half way up with water and put it on top of a bigger sheet tray to make it easier to hold. Place the baking dish with the flan in the water bath. BE CAREFULLY not to get any water in the dish.

Bake the whole thing at 350 degree for about 1 hour 15 minutes – 1 hour 30 mins. Keep and eye on it because any temp change will change the cooking time. To check the doneness use a tooth pick and see if it comes out clean.

Remove the whole thing from the oven carefully being careful not to get water in the flan. Allow the flan to cool out side a water bath.

To serve – flip flan onto a flat dish and cut into serving size pieces. Make sure it is completely cooled before flipping.

It came out great but it will never be as good as the one Jay’s mom makes. My next attempt will be with unsweetened fat free condensed milk to see if I can make a guilt free version.

20120827-095140.jpg

20120827-095148.jpg

20120827-095157.jpg

20120827-095207.jpg

20120827-095220.jpg

20120827-095231.jpg

Johnny Cakes

I think I discovered this one by accident. I am always looking for new breakfast ideas and since I always have corn meal around I wanted to see what I could do. The best part about this recipe is that you can add anything you want. This time I used blueberries but you can add bananas, strawberries or chocolate. You can even make them savory as a fun dinner side by adding a little cheese or even sauté onions or peppers.

Ingredients:

(Note- this recipe makes one serving. Multiply all ingredients for more)

1/4 cups corn meal
1 egg
1/8 cup milk ( any kind)
* 1/4 blueberries ( feel free to change it up with different fruit, chocolate, cheese or even veggies )
1/2 Tbsp sugar optional*

Mix all ingredients together and allow it to stand for a few minutes. Place batter in spoonfuls on a hot well oiled or buttered pan. Cook on one side for about two minutes until brown and then flip and repeat on opposite side. Serve hot with syrup, jelly and or butter.

20120826-231810.jpg

Egg Drop Soup

Every time I order Chinese food the first thing I get is egg drop soup. It is also the only thing I ever want when I am not feeling well. It is super easy to make and worth a try.

Ingredient:

2 Cups Chicken Broth (gluten free)
1 egg scrambled (you can use only the white of an egg if you prefer)
1/2 Tbsp of Gluten Free Soy sauce
1/2 tsp pepper
2 – 4 Tbsp chopped green onion depending on how much you like

In a pot, boil broth with soy sauce and pepper. Once liquid is boiling lower heat and add egg slowly while whisking lightly with a fork or chop stick. The egg will cook quickly and then remove soup from heat and pour into a bowl. Add green onions and serve while hot.

20120826-223535.jpg

20120826-223623.jpg

20120826-223641.jpg

BlueBerry Jam

I have started playing around with preserving food in jars. I have failed with my attempts at pickling but I seem to do well with making jam. This recipe is transferable to almost any berry. Please make sure to follow approved canning techniques to insure a safe, shelf stable product. I provided a great link for you with tons more recipes and resources if your interested:http://nchfp.uga.edu/publications/publications_usda.html

If you are from Philly then you have most likely been to one of the many great brunch places with homemade jam. I have been wanting to replicate it for a long time but was finally inspired when the market had a full flat of blueberries for $2. I adjusted the recipe’s I had by adding less sugar and no pectin. This was my first try and it came out great!!!!

Ingredients:

5 Cups blueberries (Washed, dried, stems removed)
1 1/2 Cups Sugar
Juice and zest of one lemon

I recommend reading the site I provided above for some better canning instruction but I will try to break it down below. I have taken some canning classes on canning and I can imagine it would be hard to follow with out understanding the reason behind each step. This recipe was a small batch and made 3 small jars worth. Start with the three pot set up below:

Pot 1 – Medium size pot non-reactive surface to make the jam. Place blueberries in the pot and crush. Add sugar and lemon and cook on medium heat. Continue to stir and watch the mixture so that it continues to bubble but not burn or boil over. You must stir it every few minutes. Your goal is for the mixture to become thick. It should get to the point that it wont create droplets or run easily off a cold spoon. You are looking for a consistency that slowly forms large clumps that look almost like glass forming on the spoon. Many recipes say this will take 10-15 minutes. It took me about 35 minutes but weather plays huge factor.

Pot 2- The next pot should be small with hot water for cleaning the lids. When you preserve anything in jars, the metal circle part of the lid is not re-usable. Each time you must use new lids.This is because they have a rubber lining that helps form a seal but it only works once. The jar and twisty top are good for many uses but not the flat part of the lid. In order to active the new flat top you must heat the lids to help soften the rubber. Do this by putting just the flat part of the lid in the pot with very hot water but not boiling and allow it to sit for about ten minutes before processing.

Pot 3 – Place water into the pot high enough to cover the jars with a little extra water because water will evaporate. You should use the biggest pot you own for this one like a lobster pot. Place a small towel in the bottom of the pot. This acts like a pillow to avoid the jars from breaking in the pot. Place the jars and lids in the pot and bring water to boil. Boil for ten minutes and then keep the jars in the hot water until your ready to fill.

Once the jelly cooks down and is ready to go, shut the heat off and allow it to cool for 5 minutes. Remove jars from hot water and drip dry. Fill each jar with jelly about one half inch from top. Clean the tops of the jar well with a clean towel to insure that you will make a good seal between the jar and lid. Place the lids on jars. Its important not to twist the lid on to tight because you want air to escape. A good rule is to make it finger tight.

Next, place the complete jars in the big pot of water on high heat for ten minutes. Once the water is boiling you may want to lower it a bit to keep the jars from moving to much. After ten minutes CAREFULLY remove the the jars with tongs from pot and place on counter. Its important not to put the jars on a cold surface because the sudden change in temp from the hot water to the cold counter can break the glass.

The final step is my favorite. I call it the canning musical. Once jars are out of the water you want to hear each lid make a pop sound. This insures a good seal. The sound is like the what you hear when you open a glass juice bottle. This can take up to 15 minutes depending on room temp. If you don’t hear the pop or see an indent on the top of the lid then you should keep that jar in the fridge and use it first.

Jam can stay shelf stable for up to a year but once opened should be stored in fridge. Enjoy!!!

20120817-083022.jpg

20120823-153051.jpg

Bruschetta

I wanted to give some tips on a very popular recipe right now. This is one of my favorites. Tomatoes are in season right now and I could eat them all day. I was never a big fan of bruschetta because I did not see what was so special. Once I learned how to do this the right way I was shocked by the difference.

Ingredients

5 plum tomatoes
2 Tbsp olive oil
1/3 cup chopped basil
Pinch of salt
2 cloves garlic
1/2 Cup motzerl cheese *optional
1 loaf of gluten free bread ( My pick is Sweet Christine’s baget)

Slice bread and either grill or toast it. Slice raw garlic clove in half and rub all over the toast. The hot bread will release the right amount of oil from the clove. Then Lightly oil the top of the toast. Next, slice a tomato in half and gently rub the juice onto each slice. In. A separate bowl add chopped tomato with olive oil, basil and salt. If using cheese add it at this point. Mix tomatoes well with hand and top it on bread.

20120818-001906.jpg

Quick Coconut Ice Cream

I am always trying new ice-cream creations. I try to always make it healthy and low fat. This one worked out better then most. It Is lite, fluffy and great for summer. Best of all I came up with some great tricks to make it really easy.

Ingredients:

2 Cups skim milk
2 Tbsp fat free halt and half
5 Tbsp shredded coconut
1 tsp vanilla extract
4 Tbsp Splenda
1/2 tsp salt

Put all the ingredients in a quart size container with lid. Shake ingredients well for a few minutes. This will form a nice foam on the top. You can taste the mix at this point to make sure it is as sweet as you want. Place the mix in the ice cream maker and let it go for about 25 minutes or until it is completely frozen. Eat is right away and enjoy.
For a fun spin, what ice cream is almost done, slowly add some chocolate chips and chopped almonds for an almond joy version.

20120817-082931.jpg

20120817-082947.jpg

Hidden vegetable Soup

With all the great Peanut Butter & Company flavors I have to play with I am trying to come up with some new fun ideas. With the school year around the corner its important to have some quick go to recipes that kids will love and mom is proud of. My peanut butter soup will leave all kids asking for more and they will never know its packed with veggies.

Ingredients:
3 Cups chicken broth (vegetable broth if vegan)
2 cups skim milk (almond milk if vegan)
7 Tbs Peanut Butter & Company “It’s Hot in Here” peanut butter
2 Tbs Peanut Butter & Company “Honey” peanut butter
5 carrots cut into rounds
1 can diced tomatoes
3/4 medium yellow onion chopped
3 cloves garlic
1/4 Cup diced fresh ginger
Salt and pepper to taste

Start by lightly browning the onions and garlic in a pot. Add carrots and broth and cook on medium / high heat till carrots are soft. Add all the remaining ingredients and simmer for about 45 min stirring every few minutes. Shut head off and use a food immerser to blend soup into a smooth consistency. Serve hot!!

20120817-235619.jpg