Homemade Lox

I have grown up loving lox. The salty flavor, bright color and creamy texture. Even the smallest amount often has a high price tag so I decided that I’d a great dish to re-do at home and make up the classic way with a wonderful gluten free bagel form Sweet Note Bakery.
Don’t be scared of this it’s easy!

1 pound fresh center cut salmon
2 Tbs Salt
2 Tbs Cure Salt (pink)
3Tbs Tbs Brown Sugar
1 Tbs Parsley

Rice and dry salmon well. Place plastic wrap on counter surface with salmon on top. Add both salts and sugar into a food processor and blend together well.
Pour half if the mixture in too on side if fish and run in. Flip and repeat on the other side. Now wrap fish well with plastic wrap and put into a casserole
dish. You need to press down the salmon and its easy to do with extra cans. Place In fridge and flip very 24 hours. Salmon is ready in about three day. All you need to do is rinse and dry well. Then slice thin to curve.

20130408-233719.jpg

20130408-233740.jpg

World Famous Pesto

Ok so maybe not world famous but this stuff is really become something I am getting known for. When I make this for the bakery people go CRAZY!!!! I even have kids coming in asking for me to make anything with it. This is not your everyday pesto. Normally pesto is olive oil, basil, parm and pine nuts. Well basil is expensive and I try to do a lot of nut free because so many people have nut allergies lately. I use arugula because the natural nutty flavor adds a great complexity to the sauce that will trick anyone into thinking this stuff is some crazy expensive pre-made stuff.

Ingredients:

1 Cup Olive Oil

4 Cups Arugula

1/2 Cup Parm Cheese

1 Tbs Honey or Sugar (Optional)

1/2 tsp Pepper Flakes

1/2 Cup Basil

Place everything in blender and mix up. Adjust constancy however you would like with adding more argula to thicken or oil to make it more thin.

I use pesto on everything!! Potatoes, pasta, eggs, bread, pizza or even to just make a plate looks nice. This stuff is amazing!!!

Freeze any extra

20130403-071956.jpg

20130403-072012.jpg

20130403-072032.jpg

Butter Scotch Bars

I continue to make homemade granola bars weekly since the gluten free ones at the store are crappy and expensive. They are fun to make and a great snack. This version was inspired by my trip to Harry Potter World and the amazing Butter Beer drinks. Plus it was about time a made a granola bar with out nuts for anyone that has a nut allergy.

Ingredients –

1 1/2 Cups Gluten Free Oatmeal

2 Cuts Gluten Free Brown Rice Cereal

1/2 Cup White Raisins

2 Eggs

1/4 Cup Almond Flour

1/4 Cup Coconut Shredded and Unsweetened

2 Tbs Butter

4 Tbs Brown Sugar

Pinch Salt

1/4 Milk Chocolate Chips

1 Tsp Vanilla

Start by melting butter in the microwave. Add brown sugar and vanilla to melted butter and mix well. Now in a large bowl add Oatmeal, raisins, coconut, salt, and almond flour. Mix the dry ingredients (not including rice cereal yet) well and then add melted butter and sugar mixture. Continue to mix. Once evenly mixed add eggs and again mix together. Once well combines add rice cereal and chocolate chips. Continue to mix gently being careful not to crush the rice cereal. Pour the whole mixture in a well sprayed square baking dish. Bake at 350 for 10 minutes until sides are browning. Allow to cool and cut into 12 even bars.

20130317-193327.jpg

The Skinny Monto Cristo

Monto Cristo sandwiches are a popular find on Philadelphia brunch menu’s. The sweet and salt super yummy treat is always high in fat and new gluten free. Iwas making this in school and figured I would try a gluten free and guilt free version version.

It may be on the menu for Easter weekend at the bakery so come try it!

Ingredients:

4 Slices Gluten Free Bread – (Use on with a potato bread texture and I would recommend http://www.onlinebakery.co/)

4 slices Low Fat Provolone Cheese

4 Slices Turkey Breast

4 Slices Light Ham

1 Egg + 1 White

1/3 Cup Skim Milk

2 Tbs Sugar Free Maple Syrup + More for Dipping

1/2 Tbs Vanilla

1 Tbs Brown Sugar

Pinch Salt

1/3 Cup Powder Sugar for Dusting

1 Tbs Cinnamon

3 Tbs Melted Cant Believe It’s Not Butter Light

1 – 2 Tbs Orange Marmalade

Start by whisking egg, milk, vanilla, brown sugar, salt and 2 Tbs Maple Sugar together in a bowl. Place egg bowl aside and in another smaller bowl melt butter, place orange marmalade in the melted butter and mix well. With the four pieces of bread laying on a cutting board use a brush or spoon to gently spread butter mixture on one side of each slice (the buttered side will be the inside of the sandwich). Place one slice of cheese on top of each slice (it will be touching the butter mixture). Your making two sandwiches so on one add two slices of turkey and two of ham. Close the sandwich and press together well. Now you should have two complete sandwiches each with 2 slices cheese, turkey and ham. Now spray a large pan well and heat. Dip each side of the sandwich in the egg mix. Think like making French toast. Place the dipped sandwich on a hot pan and cook over a medium heat until on side browns. Spray pan again and flip. Cook until both sides are golden. Don’t burn! The bread cooks fast and the cheese may not melt. Place the sandwiches on a cookie sheet in a 3oo degree oven for 5-8 minutes until cheese is melted.

To serve- Remove from oven and cut ends off and slice on a diagonal. Sprinkle each with powder sugar and cinnamon and serve with maple syrup for dipping. Enjoy!!!

20130314-171121.jpg

Strawberry Jam

It may not be the season but the market has been filled with strawberries all week. This is a super easy recipe and it came out AMAZING. Best jelly I have done yet. Great in oatmeal, on toast, or yogurt in the morning. Also great with a peanut butter sandwich or as a cookie center.

Ingredients-

4 (1lb) Container’s of Strawberries

2 1/2 Cups Sugar

1 (Lemon Juice and Zest)

4 (8oz Jars)

Rinse and dry all the berries. Then slice them slice them all and place in a large container with a lid. Pour in 1 Cup of the sugar, mix well and place lid on top. Leave in the fridge for 1-3 days. This will quickly break down the berries. Its great recipe because you can by the berries fresh today and it only takes a few minutes to get the first steps done and then you have up to three days to find time to can them.

When your ready set up your three pot Jar making process like below. In the one pot pour in all you strawberries and bring to boil. Add an additional cup and a half of sugar and mix well. Bring to boil and then simmer for about 30 minutes. Until it begins to reduce, hits 220 degrees and passed the glass test on the back of a spoon. Mash the mixture with a potato masher till you get the consistency you are looking for. Now add lemon zest and juice of one lemon. Cook an additional ten minutes. Now your ready to JAR!!!!!

I copy and pasted the method from my orange marm below:

This recipe makes 4 (8oz Jars). Start with the three pot set up below:

Pot 1 –Using the recipe above – In a medium size pot non-reactive surface to make the jam. Continue to stir and watch the mixture so that it continues to bubble but not burn or boil over. You must stir it every few minutes. Your goal is for the mixture to become thick. It should get to the point that it wont create droplets or run easily off a cold spoon. You are looking for a consistency that slowly forms large clumps that look almost like glass forming on the spoon. Many recipes say this will take 10-15 minutes. It took me about 45 minutes but weather plays huge factor.

Pot 2- The next pot should be small with hot water for cleaning the lids. When you preserve anything in jars, the metal circle part of the lid is not re-usable. Each time you must use new lids.This is because they have a rubber lining that helps form a seal but it only works once. The jar and twisty top are good for many uses but not the flat part of the lid. In order to active the new flat top you must heat the lids to help soften the rubber. Do this by putting just the flat part of the lid in the pot with very hot water but not boiling and allow it to sit for about ten minutes before processing.

Pot 3 – Place water into the pot high enough to cover the jars with a little extra water because water will evaporate. You should use the biggest pot you own for this one like a lobster pot. Place a small towel in the bottom of the pot. This acts like a pillow to avoid the jars from breaking in the pot. Place the jars and lids in the pot and bring water to boil. Boil for ten minutes and then keep the jars in the hot water until your ready to fill.

Once the jelly cooks down and is ready to go, shut the heat off and allow it to cool for 5 minutes. Remove jars from hot water and drip dry. Fill each jar with jelly about one half inch from top. Clean the tops of the jar well with a clean wet towel to insure that you will make a good seal between the jar and lid. Place the lids on jars. Its important not to twist the lid on to tight because you want air to escape. A good rule is to make it finger tight.

Next, place the complete jars in the big pot of water on high heat for ten minutes. Once the water is boiling you may want to lower it a bit to keep the jars from moving to much. After ten minutes CAREFULLY remove the the jars with tongs from pot and place on counter. Its important not to put the jars on a cold surface because the sudden change in temp from the hot water to the cold counter can break the glass.

The final step is my favorite. I call it the canning musical. Once jars are out of the water you want to hear each lid make a pop sound. This insures a good seal. The sound is like the what you hear when you open a glass juice bottle. This can take up to 15 minutes depending on room temp. If you don’t hear the pop or see an indent on the top of the lid then you should keep that jar in the fridge and use it first.

Jam can stay shelf stable for up to a year but once opened should be stored in fridge. Enjoy!!!

20130308-113301.jpg

“Hell-o” Fruit Salad

I am giggling while I write that title because if you knew Jay’s mom you would understand why I love this very bubbly, caring and amazing person. Ellen is always super supportive of all my endeavors regardless of what I may be up to. She knows that I take very good care of her son and that normally means feeding him well. Since Ellen was born and grew up in the Philippians I am consistently exposed to new dishes that I would have never tried. Jay often misses his mom’s best dishes and Ellen does her best at sharing the recipes for me to re-create at home. Momma Ellen will always make the best but I am told my replications are pretty good. This is another one of her famous Philippines dishes. We shared it at our Super Bowl party and it was a hit.

Whenever Momma Ellen calls it is customary to say “Hell-o”

Ingredients:

1/2 Can Condensed Sweetened Milk

1/2 Bar Cream Cheese

2 Big Cans Tropical Fruit Salad in Light Syrup

1 Big Can Sliced Peaches in Light Syrup

1 Small Can Little Oranges in Light Syrup

1 Jar Coconut Jelly (Find in Asian Store) Optional*

Start by draining all fruit very well. I placed it in a colander in the sink for 10 minutes. Place cream cheese and condensed milk in food processor or mixer and blend it together until smooth. Pour fruit in bowl and then pour milk mix on top. Mix it all together well and place in fridge for two hours before serving.

ENJOY!!!!!! Thanks Momma …

20130302-062513.jpg

Protein Waffle

I had made a million different kind of waffles. Always playing with the recipe to make something that is gluten free, guilt free and tasty. Since Jay said this one is the best I figured I would share.

Ingredients:

1 Egg

2 Tbs Crushed Cuts or Nut Flour (I used pecans)

1 Banana

1/2 tsp Baking Soda

1 tsp Vanilla

1/2 tsp Cinnamon

Place all the ingredients in a quart container or large bowl. Using a hand blender or food processor mix all ingredients together very well. Pour into a waffle iron and cook for 3 1/2 to 4 minutes. Serve with any topping and enjoy. I topped mine with ricotta cheese and my homemade apple butter.

20130211-092255.jpg

20130211-092314.jpg

Herbalife!!! Time to get healthy and lose some weight!

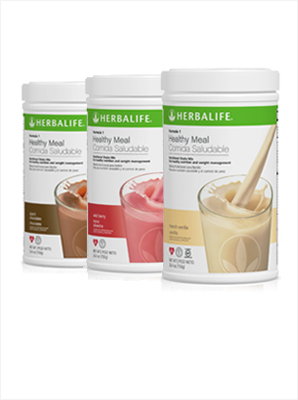
I love to be able to introduce new products that I truly believe in. Today I learned about a great gluten free nutritional product line that is worth it’s weight in gold. Herbalife has a gluten free line!

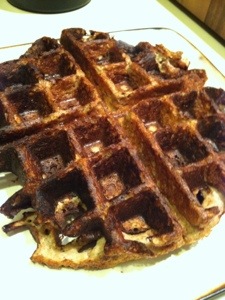
If you’re trying to get healthy, eat balanced and lose weight it can be tricky. Luckily with blogs and guides like mine it is easier to make great meals but when you’re short on time and living a busy life it is hard to always make healthy choices. Especially being gluten free, most grab and go stuff is high fat and high calories making weight loss a challenge.

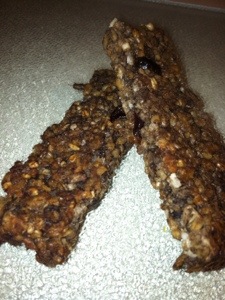
Have you considered including supplements into your daily routine. This could be replacing a protein shake for your breakfast or lunch. Maybe having a low cal protein bar for a snack. Luckily HerbalLife a leading supplement company for years has developed a gluten free line and the products are outstanding. I visited one of the locations in PA and had a chance to sample some great product’s and was blown away by the taste and effectiveness to curve my hunger.

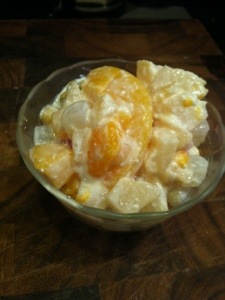
I am always on the road running around and it’s often a challenge to find a healthy high protein snack that is gluten free and grab and go. I have become good at preparing food but now all I need to do is bring a shake along with me and I can be for the day.

This stuff is proven to have you feeling great and losing weight in only a few weeks. I am very selective on what I market but this stuff really is impressive. If you’re interested in trying some of it out are read more then check out the site below and let me know what you think. You can order direct from the site and the prices are amazing.

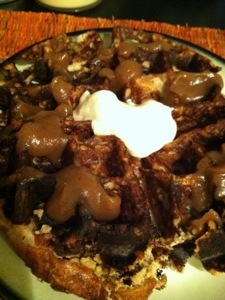
If I get a lot of interest I will start to review each product in the line and come up with some great shake and recipe ideas to make it fun. If you live in the Philadelphia or Malvern area let me know and I set you up to try some stuff out.

Herbal Life: Click Here To Check It Out

hebal life

Herbalife protein shakes and snacks, vitamins and dietary supplements, energy and fitness drinks, skin and hair care products, combined with healthy eating and exercise, can help you lead a healthy, active life.

Herbalife is committed to developing innovative, effective products that are based on the highest research, development and manufacturing standards. We’re fully dedicated to setting the standard by which all nutrition companies are measured.

Weight Management

Trying to maintain weight? Our science-based Weight Management products, including Formula 1 Nutritional Shakes, help millions around the world look and feel great every day.

Energy and Fitness

Whether you’re a serious athlete or a weekend warrior, Herbalife Sports & Fitness products support recovery and performance through good nutrition.

Targeted Nutrition

Our Targeted Nutrition products offer a balance of essential nutrients to support heart health, stress management, men’s and women’s health, digestive health and more.

Outer Nutrition

Nourish skin and hair with Herbalife outer nutrition products – your secret to maintaining a healthy, youthful appearance.

Pamelo

I don’t think I ever just introduced an ingredient before but Pamelo is currently in season and an item many people are turned off from. This fruit is tradition in South East Asia. Similar smell and outer appearance to a grapefruit but about twice the size. The outer layer of the fruit is very thick. The inside is a bright pink fruit with a similar constancy and texture of an orange. The flavor is a cross between a sweet grape fruit and an orange.

To prepare

Remove peel. Then slowly remove as much of the “pith” as possible including the thick marerial separating each section of the fruit. The pith is bitter and very think.

Panelo is easily eaten plan or traditionally served with a blend of sugar and chile powder blend for dipping.

Find on at any local Asian grocery store. Enjoy!

20130128-063931.jpg

20130128-063936.jpg

20130220-090959.jpg

Adventure Bars

The hardest thing about being gluten free is having trouble finding healthy good eats when on the go. I am a very outdoors person and I am always trying to find new things to take for long days out doors. I will not spend $3 on a gluten free granola bar. This recipe is amazing. Full of protein, gluten free, low in sugar and tasty.

Ingredients:

1 1/2 Cups Rice Crispy Cereal

1 1/2 Cup Old Fashion Oat Meal (gluten free)

1/2 Cup Dry Coconut

1/2 Cup Dry Cranberries and or Raisins

3 Tbs Peanut Butter

3 Tbs Honey

2 eggs

4 Tbs Splenda / Sugar

1/2 Cup Crushed Pecans

1 tsp Vanilla

1 tsp salt

In one bowl mix peanut butter and honey and heat in microwave for a few second to loosen. After it cools add vanilla, salt and sugar then mix well and put it aside. In a larger bowl mix oatmeal, coconut, dried fruit and crushed pecans. Return to the first bowl with peanut butter and mix in eggs well then add this liquid mix to the dry bowl and continue mixing. Finally, add the rice cereal to the mix and mix everything together well. Press mixture into a square baking well greased baking dish and cook for about 15 minutes at 350 degrees until golden brown. Allow to cool and then cut into bars. Enjoy!!!!

20130117-071013.jpg

20130117-071025.jpg