Eggplant Parm – NFCA Summer Block Party

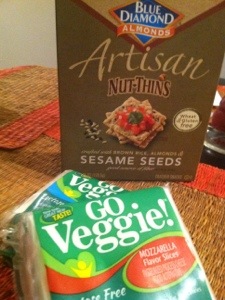
As always the NFCA is running a great product promotions. This week they asked me to review two products and create a fun recipe with them both. The first product is Artisan Nut Thins and the second is Go Veggie! Lactose-free cheese.

Both products are great. I have used the cheese before at the bakery for dairy free pizza and it really melts like the real thing. The nut thins are the best gluten free cracker I have reviewed yet. They are crispy, crunchy and the nutty flavor is great and they are higher in protein then most other crackers.

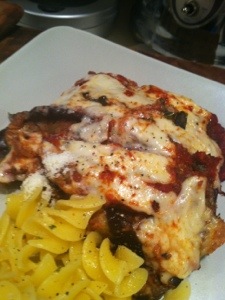
A good friend of mine just moved into my area of the city and I want to make her dinner. Since I live in the Italian market and she is vegetarian I decided a good eggplant parm would be a hit. She loved every bite and I am sure you will too!

;

If you want to try some of the products check out a giveaway they are doing http://www.celiaccentral.org/blockparty/giveaway/Ingredients:

3 Eggplants

1 Cup Salt (yes, sounds crazy but keep reading)

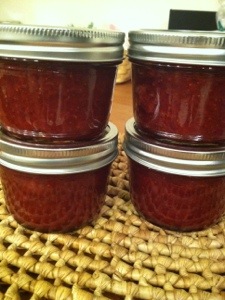
1 Jar Tomato Sauce (I spice mine up with olive, capers, basil, chili, red wine and balsamic)

2 Box – Artisan Nut Thinks (Crushed in food processor)

½ – Cup Go Veggie! Parm Cheese

10 Slices Go Veggie Mozzarella Cheese Slices

1 Tbs Garlic

1 Tbs Oregano

Pan Spray

Start by cutting the eggplant in to long thin slices. I used a micro planner, which helped keep the pieces even. Coat each piece heavily with salt. Let the salted eggplant sit salted for 30 – 60 min. The salt pulls some of the water out of the eggplant and prevents it from turning brown and soft.

While eggplant sits, start making the coating. Place all the cracker crumbs in a bowl and mix with parm cheese, garlic and oregano.

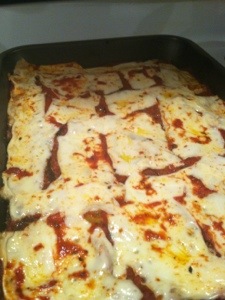
Once eggplant is done rinse is well under the sink well to remove salt. Coat each piece with cracker crumb mix and place bake on baking sheet in a single layer. Bake coated eggplant for 10 min at 350 degrees. Then remove eggplant and layer in a casserole dish alternating layers of eggplant and tomato sauce. Make sure to coat the top layer well with sauce. Last, break up cheese and cover the top. Spray the top with none stick spray and bake at 350 degrees for 30-40 minutes. Cook uncovered for the first half and then cover with tin foil for the last 20 minutes.

Serve hot and enjoy!!!

20130729-115115.jpg

20130729-115129.jpg

20130729-115145.jpg

20130729-115219.jpg

20130729-115234.jpg

Strawberry Jam

It may not be the season but the market has been filled with strawberries all week. This is a super easy recipe and it came out AMAZING. Best jelly I have done yet. Great in oatmeal, on toast, or yogurt in the morning. Also great with a peanut butter sandwich or as a cookie center.

Ingredients-

4 (1lb) Container’s of Strawberries

2 1/2 Cups Sugar

1 (Lemon Juice and Zest)

4 (8oz Jars)

Rinse and dry all the berries. Then slice them slice them all and place in a large container with a lid. Pour in 1 Cup of the sugar, mix well and place lid on top. Leave in the fridge for 1-3 days. This will quickly break down the berries. Its great recipe because you can by the berries fresh today and it only takes a few minutes to get the first steps done and then you have up to three days to find time to can them.

When your ready set up your three pot Jar making process like below. In the one pot pour in all you strawberries and bring to boil. Add an additional cup and a half of sugar and mix well. Bring to boil and then simmer for about 30 minutes. Until it begins to reduce, hits 220 degrees and passed the glass test on the back of a spoon. Mash the mixture with a potato masher till you get the consistency you are looking for. Now add lemon zest and juice of one lemon. Cook an additional ten minutes. Now your ready to JAR!!!!!

I copy and pasted the method from my orange marm below:

This recipe makes 4 (8oz Jars). Start with the three pot set up below:

Pot 1 –Using the recipe above – In a medium size pot non-reactive surface to make the jam. Continue to stir and watch the mixture so that it continues to bubble but not burn or boil over. You must stir it every few minutes. Your goal is for the mixture to become thick. It should get to the point that it wont create droplets or run easily off a cold spoon. You are looking for a consistency that slowly forms large clumps that look almost like glass forming on the spoon. Many recipes say this will take 10-15 minutes. It took me about 45 minutes but weather plays huge factor.

Pot 2- The next pot should be small with hot water for cleaning the lids. When you preserve anything in jars, the metal circle part of the lid is not re-usable. Each time you must use new lids.This is because they have a rubber lining that helps form a seal but it only works once. The jar and twisty top are good for many uses but not the flat part of the lid. In order to active the new flat top you must heat the lids to help soften the rubber. Do this by putting just the flat part of the lid in the pot with very hot water but not boiling and allow it to sit for about ten minutes before processing.

Pot 3 – Place water into the pot high enough to cover the jars with a little extra water because water will evaporate. You should use the biggest pot you own for this one like a lobster pot. Place a small towel in the bottom of the pot. This acts like a pillow to avoid the jars from breaking in the pot. Place the jars and lids in the pot and bring water to boil. Boil for ten minutes and then keep the jars in the hot water until your ready to fill.

Once the jelly cooks down and is ready to go, shut the heat off and allow it to cool for 5 minutes. Remove jars from hot water and drip dry. Fill each jar with jelly about one half inch from top. Clean the tops of the jar well with a clean wet towel to insure that you will make a good seal between the jar and lid. Place the lids on jars. Its important not to twist the lid on to tight because you want air to escape. A good rule is to make it finger tight.

Next, place the complete jars in the big pot of water on high heat for ten minutes. Once the water is boiling you may want to lower it a bit to keep the jars from moving to much. After ten minutes CAREFULLY remove the the jars with tongs from pot and place on counter. Its important not to put the jars on a cold surface because the sudden change in temp from the hot water to the cold counter can break the glass.

The final step is my favorite. I call it the canning musical. Once jars are out of the water you want to hear each lid make a pop sound. This insures a good seal. The sound is like the what you hear when you open a glass juice bottle. This can take up to 15 minutes depending on room temp. If you don’t hear the pop or see an indent on the top of the lid then you should keep that jar in the fridge and use it first.

Jam can stay shelf stable for up to a year but once opened should be stored in fridge. Enjoy!!!

20130308-113301.jpg